Form validation
Our validation aligns with web standards, and it is powerful and intuitive. We cover the following validation rules.
| Name | Description |
| Required | If the input value is required. |
| Min | It defines the minimum value that is acceptable and valid |
| Max | It defines the maximum value that is acceptable and valid |
| Min length | It defines the minimum number of characters. |
| Max length | It defines the maximum number of characters. |
| Pattern | A regular expression the form control's value should match. |
| Validate | A custom validation logic. |
Go to the form section.
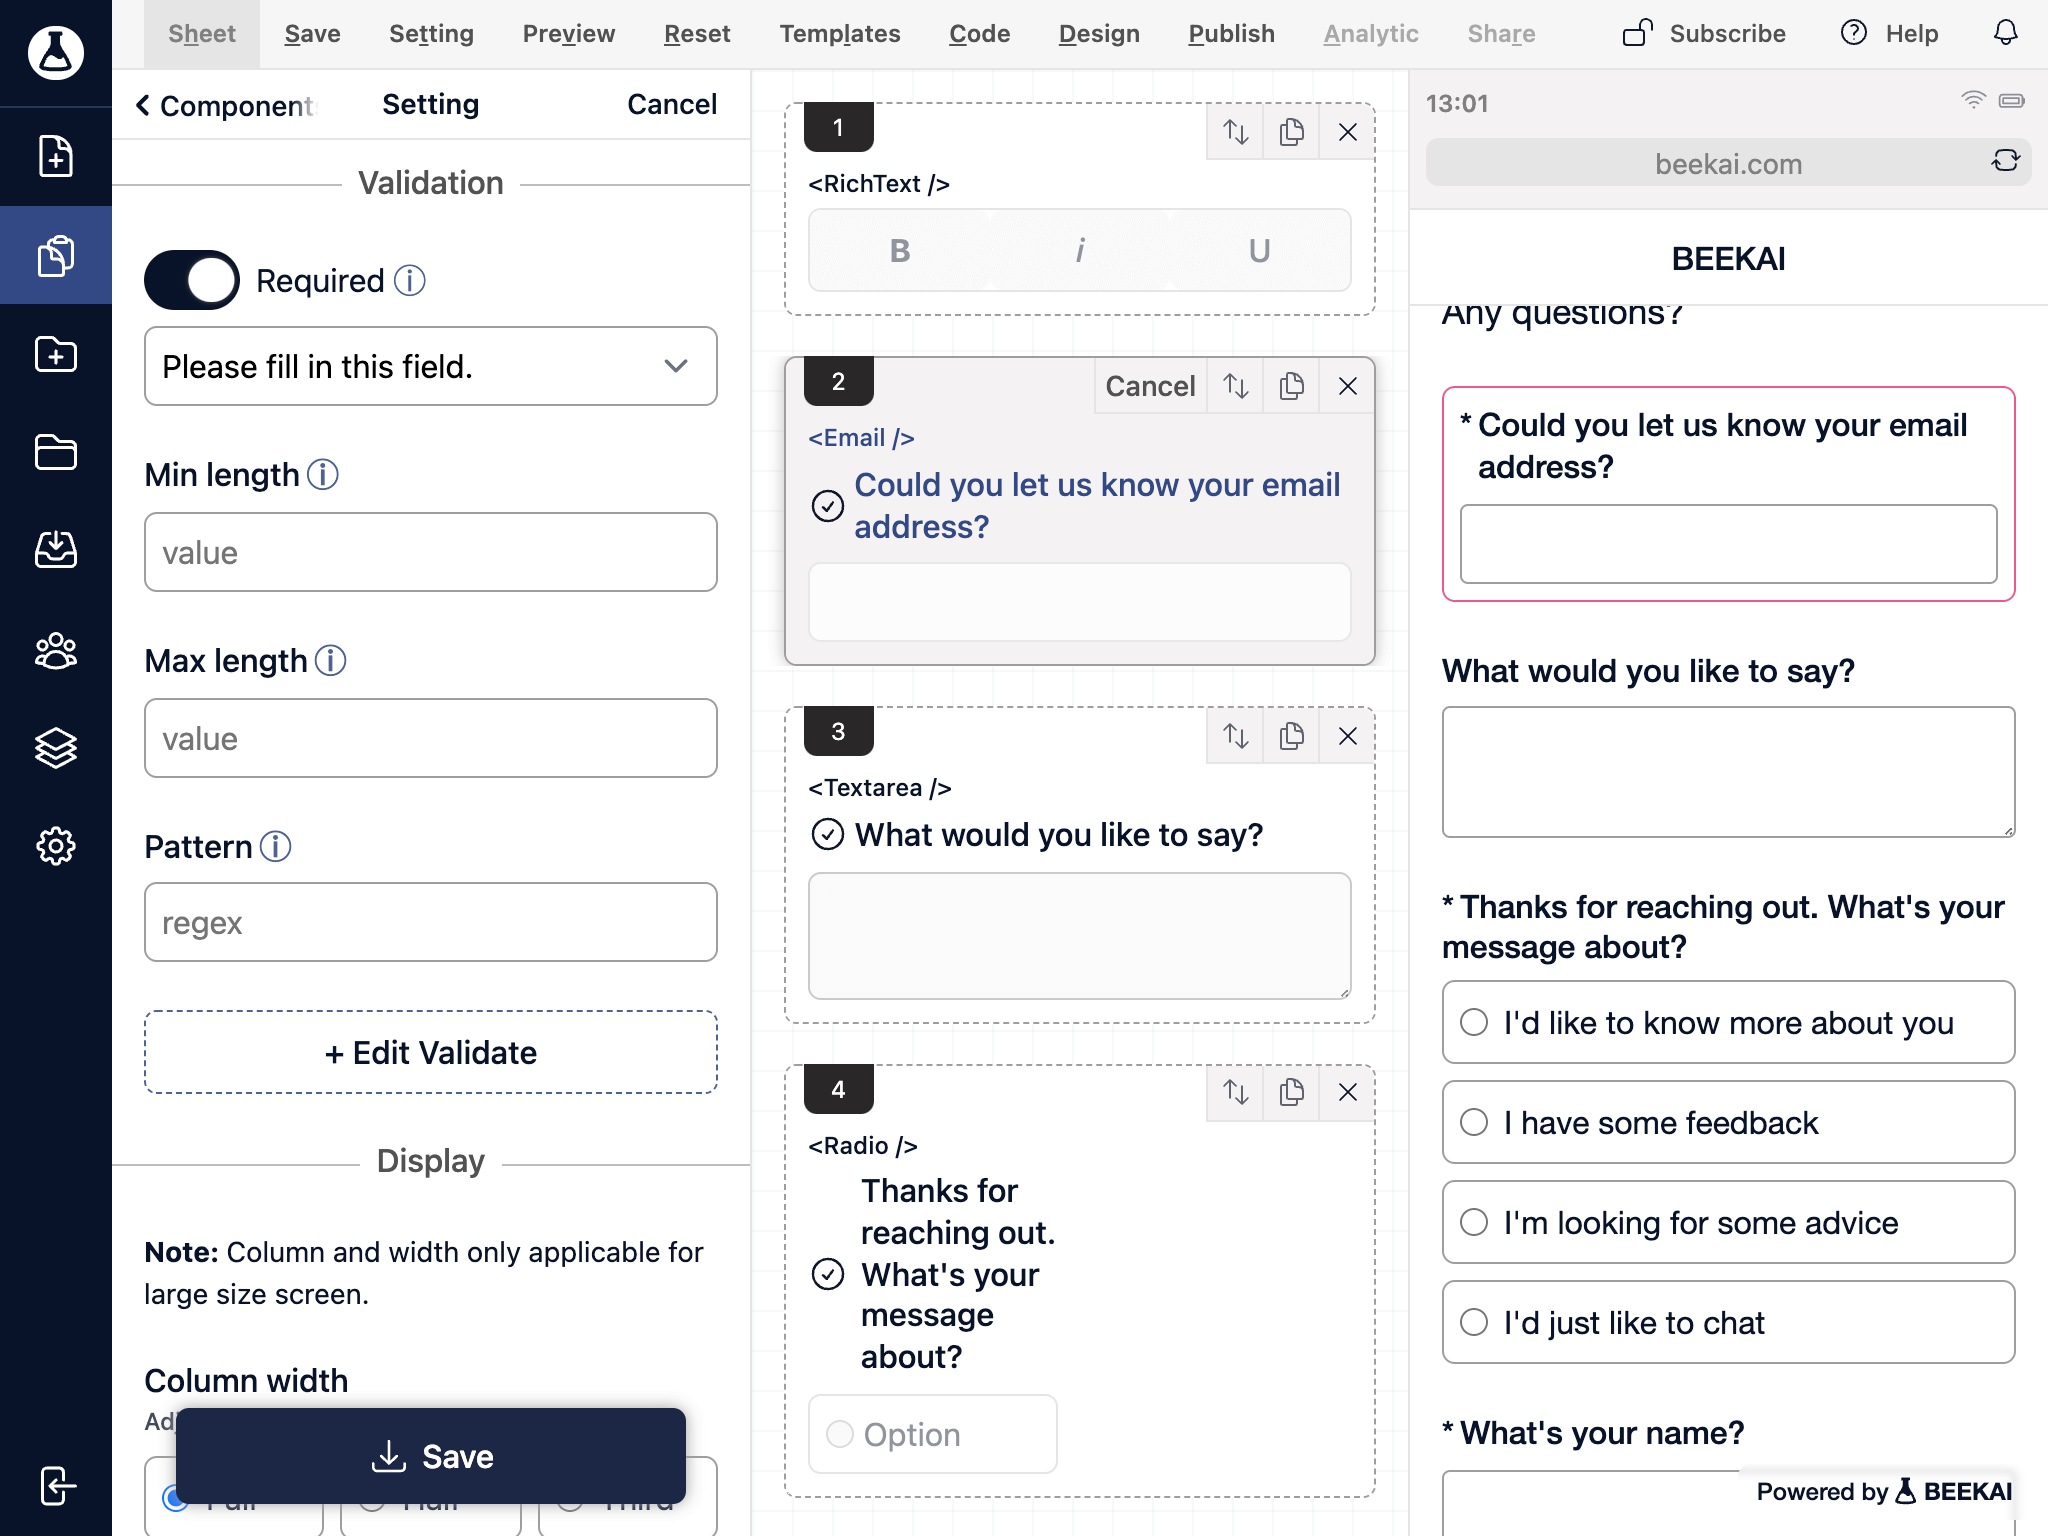
Click on a selected field, and scroll down to the validation section.

You can turn on the required option and leave an associated error message to guide your customer on how to fix it. The same rules apply to the rest of the validation logic by setting a validation rule and supplied with an error message.
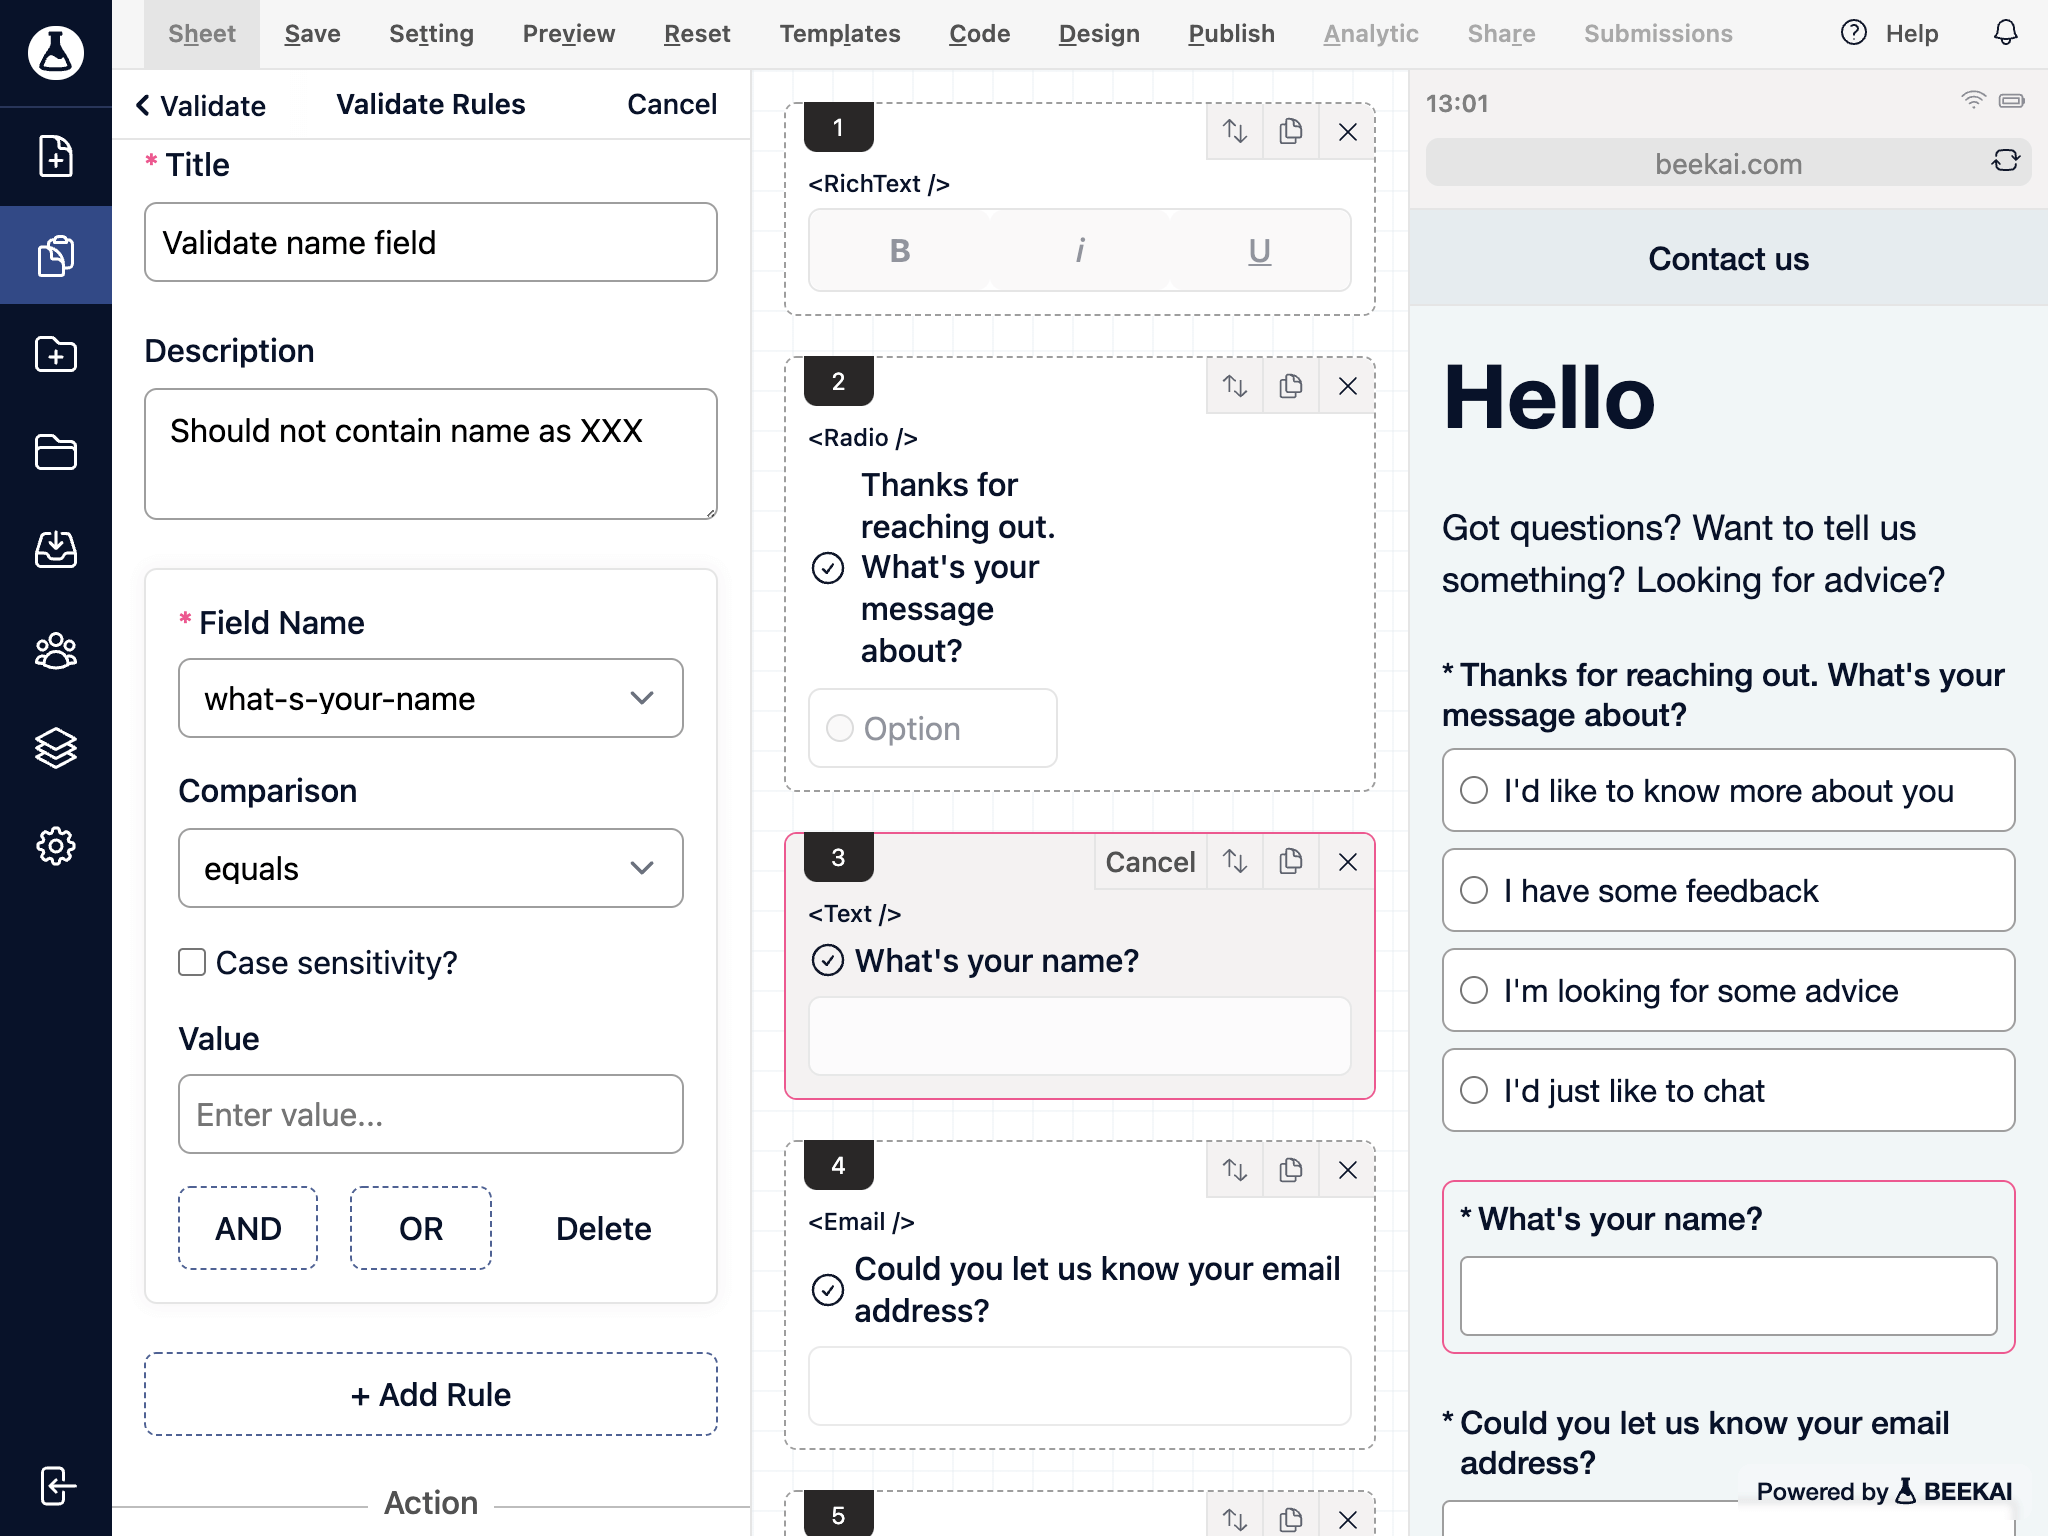
Click on the Edit Validate button. It will navigate you to the custom validation panel. Then click on the Add button to start to introduce custom validation logic.

1. Select the Field Name
2. Select comparison logic to equals
3. It is optional to turn on case sensitivity.
4. Enter a matching value
5. Lastly enter the error message when the above condition not meet.
You can validate against the current field or other fields in the form. Selecting AND or OR button will combine the validation base on the condition logic. For example, you can target this field not to contain the words XXX and YYY.